Showing posts with label tips. Show all posts

Sunday, November 28, 2010

Add Animated Flash Clock To Your Blogger - Blogspot Blog

 Two most common widgets bloggers and webmasters put on their websites/blogs are a Clock and a Calendar. When searched on Internet for these free widgets, most probably the top two results in the list would be clocklink.com and worldtimeserver.com/index.aspx.this tutorial will show you how to Add animated flash clock gadget your blog. A clock gives a beautiful look to a website. A clock is a must for a personal homepage, forum, blog etc.Isn’t it exciting when you get a highly quality flash Clock absolutely Free? you can add this flash animated clock your blog easily. it's really faster and cool. all you have to do is follow the instructions given below.. let's go to work.and Congrats you!! I hope you like the clocks.


UPDATE: I updated some of my posts, this post I update Animated Flash Clock To Your Blogger Blog ..........
clock is a must for a personal blog.A clock gives a beautiful look to a website. so i have created a generator for this widget because you can easy to add this widget to your blog....(more)

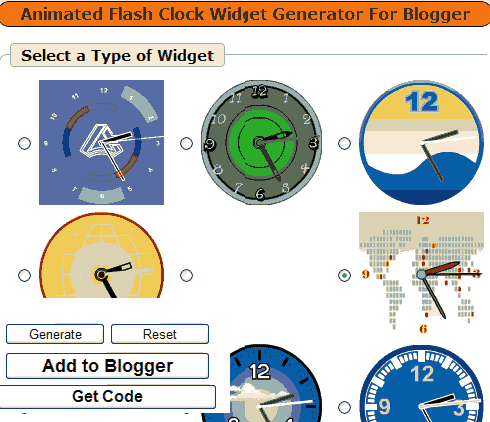
Animated Flash Clock Widget Generator For Blogger


1.Login to your blogger Dashboard and go to Desing --> Page Elements.


2.Click on 'Add a Gadget' on the sidebar.


3.Select 'HTML/Javascript' and add the one of code given below


4. Now Click On Save 'JavaScript' You are done.

Happy blogging!


Special Thanks http://flash-clocks.com

Picture From http://www.2dayblog.com/2009/10/19/manual-digital-clock/


Friday, April 23, 2010

Hex Color Code Chart & Generator


How To Add Top Navigation menu Bar To Blogger


STEP #1
Log in to Blogger -> Layout -> Edit HTMLand select the tick-boxExpand Widget Templates
Then, find (CTRL+F) this code in the template:

]]></b:skin>
And immediately before it, paste this code:

/*URL: http://bdlab.blogspot.com/*/

.basictab{
padding: 3px 0;
margin-left: 0;
font: bold 12px Verdana;
border-bottom: 1px solid gray;
list-style-type: none;
text-align: left; /*set to left, center, or right to align the menu as desired*/
}

.basictab li{
display: inline;
margin: 0;
}

.basictab li a{
text-decoration: none;
padding: 3px 7px;
margin-right: 3px;
border: 1px solid gray;
border-bottom: none;
background-color: #f6ffd5;
color: #2d2b2b;
}

.basictab li a:visited{
color: #2d2b2b;
}

.basictab li a:hover{
background-color: #DBFF6C;
color: black;
}

.basictab li a:active{
color: black;
}

.basictab li.selected a{ /*selected tab effect*/
position: relative;
top: 1px;
padding-top: 4px;
background-color: #DBFF6C;
color: black;
}

NOW CLICK SAVE TEMPLATE


Add The Menu To Our Template

Go To your Blogger Dashboard, Layout >> Page Elements >>

and now above blog posts area, click add gadget,


image
Then add this code in to it:

<ul class="basictab">
<li class="selected"><a href="http://bdlab.blogspot.com">Home</a></li>
<li><a href="http://bdlab.blogspot.com/">Blogger Templates</a></li>
<li><a href="http://bdlab.blogspot.com/">Blogegr Tricks</a></li>
<li><a href="#">Edit</a></li>
</ul>

Now click Save